Your landing pages are part of your brand so they should have the similar fonts, graphics and color theme to match your brand.
You don’t always get your brand fonts in Google fonts, so either you’ve to find the similar looking fonts in Google Fonts or use custom fonts instead.
Clickfunnels or any other landing page platform doesn’t offer this feature yet to upload your custom fonts in your landing pages.
But you can now use custom fonts with the help of some CSS and instructions below.
The following code and trick can be used in any landing page platform and it will definitely work. I have tried it in Unbounce, Instapage, Clickfunnels and many other.
Please follow the steps written below:
1. Upload your font file to your server or a CDN ( Content Delivery Network ).
Unbounce doesn’t allow you to upload fonts so you’ll have to upload it to your web hosting or CDN like Amazon S3 or Max CDN.
Amazon S3 offers upto 5 GB of FREE storage so you can use it upload your fonts and other files as well.
In case you would like to use your hosting or website to upload the font, then it may not work in Chrome browser because of the rendering issues, so you should do the following to make it work.
- Go to your cpanel and look for the .htaccess file
- Add the following code in your .htaccess file and save it.
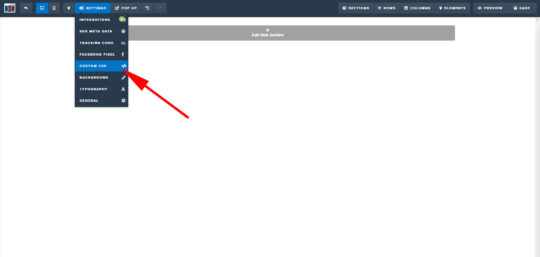
<FilesMatch "\.(ttf|otf|eot)$">
<IfModule mod_headers.c>
Header set Access-Control-Allow-Origin "*"

</IfModule>
</FilesMatch>
2. Write below code in your Clickfunnels page CSS.
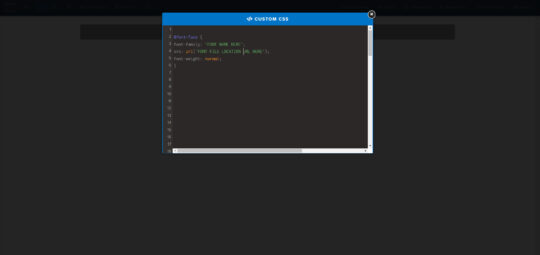
@font-face {
    font-family: 'YOUR FONT NAME HERE'; /* Add the name of your font here */
    src: url('YOUR FONT FILE URL HERE') format('truetype');
 /* Replace the 'YOUR FONT FILE URL HERE' with your font URL on your domain or CDN */
  }

 /*Use the above create font-family name as below in your page*/

  #section-1200 {
 font-family: 'ADD THE FONT NAME HERE' !important;
/* Replace #section-1200 with your element ID /*
/* Replace the 'ADD THE FONT NAME HERE' with your font name created in the first step */ }
3. Replace “YOUR FONT NAME HERE” with a name or word you would like to give you to your font. It’s like giving a name to your page or file.
4. Replace “YOUR FONT FILE URL HERE” with the URL of your font file.
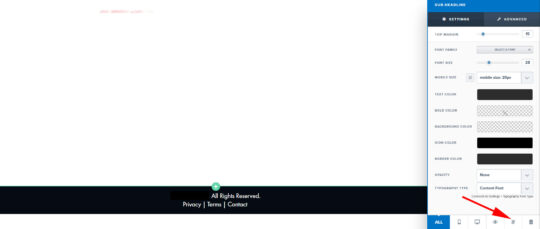
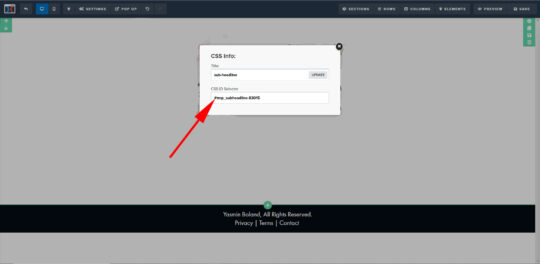
5. Replace “#section-1200” with the your font ID. That you can find on the bottom right of the screen when you select the element.
6. Save your page and republish it to see the changes live.
That’s it. You should see the custom fonts working on your page.
Post Views: 737